About the Appointment Book Toolbar
The Appointment Book toolbar (shown below) is how you change views and filter content in the Appointment Book.

Menu shortcuts
Access the appointment menu by selecting the Menu icon ![]() .
.
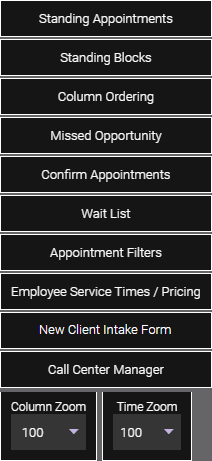
- Standing Appointments: Opens the Standing Appointments maintenance form.
- Standing Blocks: Opens the Standing Blocks maintenance form.
- Column Ordering: Opens a window that allows you to reorder columns as they appear in the Appointment Book. Note that shared employees will always appear in the far-left column.
- Missed Opportunity: Opens a window that allows you to record a missed opportunity.
- Confirm Appointments: Opens the Confirmation Manager.
- Wait List: Opens the Wait List.
- Appointment Filters: Opens the Appointment Filters pop-up window, where you can filter appointments according to status or other relevant information. When you apply filters from this window, the relevant appointments appear in color, and the rest are grayed out.
- Filter by appointment details: Booked By, Status, Confirmation Status, Client Type, Resources, Equipment, Appointment Category, and Yield Management Program, which filters the book to only show the overlays for the selected Program.
- Required Docs & Forms not yet submitted
- Has Appointment Notes
- Has Client Notes
- Booked Online
- Booked via Call Center/Booking Agent
- Booked via MyMeevo App
- Service Category Booked First Time
- New Client
- Walk-in
- Rebooked
- Repeat client business
- Repeat client employee
- Display No-Shows
- Employee Services Times / Pricing: Opens the Employee Service Times / Pricing lookup screen.
- New Client Intake Form: Opens a blank Client Intake Form for the client to fill out.
- Booking Agent: Opens the Booking Agent.
- Column Zoom and Time Zoom drop-downs: Allows you to resize the width of columns and height of the rows.
Date view controls
Use the date controls to change the Appointment Book date view.

- Select the calendar icon to display the calendar and jump to a selected date.

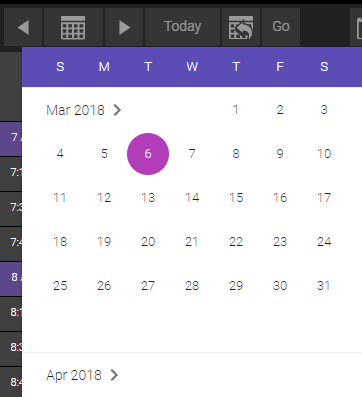
- Select the left or right arrows on either side of the calendar icon to jump ahead or back a day (if in day view) or calendar week (if in week view).
- Select Today to display appointments for today. Selecting Today automatically changes the Appointment Book to day view and maintains any applied filters.
- Select Today: No filters to view all employees on the schedule today, with no filters.

- Select Go to jump ahead up to 10 weeks.

Day and week view
The day view ![]() and week view
and week view ![]() toggle the calendar to display one particular date or a particular date range (7 days), respectively.
toggle the calendar to display one particular date or a particular date range (7 days), respectively.
Week view is best used after applying a filter; for example, apply an Employee Category filter in the Appointment Book and then switch to week view to see, by week, those employees on the book.
If in employee week view, you can select the date column heading to go back to the regular day view for the selected day.
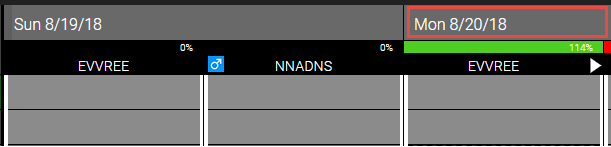
Note: The percentage bar above the employee's name in the Appointment Book represents the percentage booked for that employee based on their scheduled availability.
Filters
Select the Filters icon ![]() to display the pop-up window, where you can apply various filters depending on what view you are in. Note that you can add more than one selection for each filter.
to display the pop-up window, where you can apply various filters depending on what view you are in. Note that you can add more than one selection for each filter.
Employee View
Note: When more than one filter is applied, they have an AND relationship.
- Employee Names: Only displays appointments booked with the selected employees.
- Employee Categories: Only displays appointments booked with the selected Employee Categories.
- Services That Employee Can Perform: When you select a service here and Apply the filter, the Appointment Book only displays employees who can perform that service. This filter works in conjunction with the Employee Names
Resource View
- Resources: Displays only the selected resources.
- Services That Can be Performed in a Resource: Displays only those resources that are configured to accept the service selected here.
- Display No-Shows: Includes no-shows in the Appointment Book.
Employee View and Resource View
When you switch between Employee and Resource view, the date and time ranges do not change.
The Employee View ![]() is the default Appointment Book view. Employee names (in the form of Employee Code) appear across the header rows of the book, while time of day appears along the left and right columns.
is the default Appointment Book view. Employee names (in the form of Employee Code) appear across the header rows of the book, while time of day appears along the left and right columns.

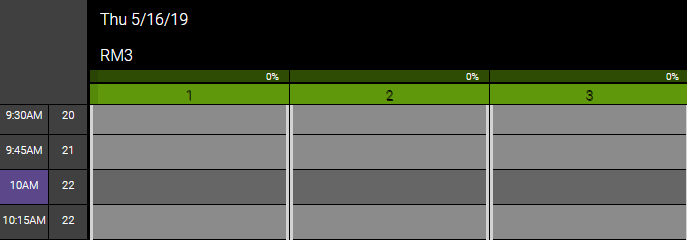
The Resource View ![]() displays which, if any, resources are bookable for the given day or week. Resource names and the corresponding maximum client capacity appear across the header rows, while times appear along the left and right columns. Note that Resource View is available only if at least one resource is created.
displays which, if any, resources are bookable for the given day or week. Resource names and the corresponding maximum client capacity appear across the header rows, while times appear along the left and right columns. Note that Resource View is available only if at least one resource is created.
Cascade View and Default View
Cascade View ![]() displays employee columns beginning with the earliest start time, from left to right.
displays employee columns beginning with the earliest start time, from left to right.
Default View ![]() displays employees according to Column Ordering in the menu.
displays employees according to Column Ordering in the menu.
Refresh
Select the refresh icon  to reload the Appointment Book. This is especially useful after option changes that may affect how the Appointment Book displays.
Precision View
Note: In Business Preferences, Enable Precision Timing must be enabled for Precision View to be available.
Toggle Precision View on  to view the Appointment Book in 5-minute increments. Toggle Precision View off
  to return to your default Appointment Book increment, which is defined in Business Information's Appointment Book Intervals.