Editing Appointment Details
This topic covers editing appointments that have not yet been checked out and editing appointments that have been checked out.
Note about past appointments: Past appointments that are not checked out cannot be edited. Once checked out, a past appointment can be edited as described in the "checked out" section below.
To edit details for an appointment that has not been checked out
To edit appointment details for an appointment that has not been checked out:
- Locate the appointment.
- Select Edit from the Smart Assistant menu or from the Client Quick Find menu.
If you are editing a Standing Appointment, a message displays asking if you want to edit this specific appointment or the series. Select the appropriate option to display the Appointment Editor.
- See below to edit appointment details.
To change the employee
- From Appointment Editor, select the service from the right panel of the Appointment Editor.
- Choose a new employee from the Employees drop-down. Only employees who are configured to perform the selected service will appear in this list.
- When finished, select Save.
To add a service
- From Appointment Editor, select Add'l Service in the Appointment Editor.
![]()
- Choose a Service. The service appears on the right side of the Appointment Editor.
- Verify the client and service details.
- When finished, select Save to save your changes to the Appointment Book.
To replace a service
To replace a service in an appointment while maintaining the same client, service provider, and start time:
- From Appointment Editor, select the X next to the service to replace. The Service field becomes empty and is highlighted in red.
- Choose a new Service. The service updates on the right side of the Appointment Editor.
Note: If the new service is not defined with the currently selected resource, a warning message appears. Select OK to clear the message. If the service is defined with a different resource, that resource appears in the Resource field.
- Verify the client and service details.
- When finished, select Save to save your changes to the Appointment Book.
To edit service add-ons
- From Appointment Editor, select Service Add-ons.
![]()
- In the Service Add-ons window, select or deselect the add-ons.
- When finished, select Save.
To edit service step timings by dragging the end time in the Appointment Book
Note: Your ability to edit service step timings depends on whether or not the Do not allow service step timing adjustments when booking option is enabled in the service definition.
You can drag the end time of a service step to adjust its timing, provided the Business Preferences option is enabled.
While in the standard Appointment Book view:
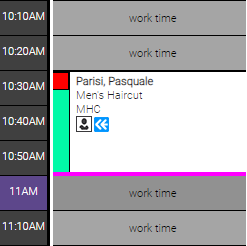
- Select the appointment. The bottom block line highlights in magenta.
- Select and hold the magenta line and drag it up or down to adjust the length. As you do, a hashed magenta line indicates the new length of the block.
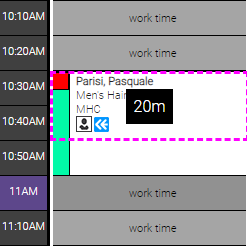
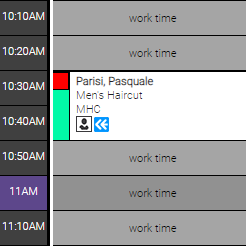
- Release the line to save the new block length.
To edit service step timings using the Appointment Editor
- From Appointment Editor, select Service Steps next to Service.
![]()
- From the Steps window, select any Duration and choose a new duration from the drop-down.
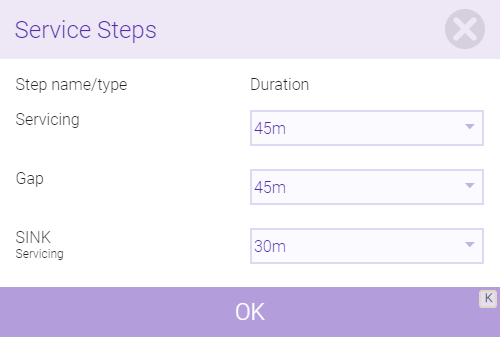
- When finished, select OK.
- Select Save in the Appointment Editor.
- As a best practice, verify that the service steps are correct in the calendar before closing the Appointment Book.
To remove a service
To remove a service from an appointment:
- Select X next to the service. The Delete Appointment window appears.
- Select the service(s) to remove from the appointment.
- Select a reason for the cancellation from the drop-down list and select Delete. A confirmation message appears.
- Select Yes.
- Select Save to save your changes to the Appointment Book.
- As a best practice, verify that the service/appointment is deleted in the calendar before closing the Appointment Book.
To change the client to anonymous
To change the Paying Client or Client receiving the service for this appointment to an anonymous client:
- Select Anonymous Client next to the client you want to change.
![]()
- Select an anonymous option.
- When finished, select Save.
- As a best practice, verify the updated appointment details in the calendar before closing the Appointment Book.
To change the Paying Client
Note: Meevo does not automatically resend appointment notifications when the Paying Client is changed after booking; the original client retains the notifications.
Select the X beside the client and choose a new Paying Client.
Note that if the new Paying Client's profile is set to Do Not Confirm, the appointment status will reflect that. The inverse of this is also true, so changing from a client who does have Do Not Confirm enabled to one who doesn't will change the appointment status to Unconfirmed.
To edit details for an appointment that was checked out
You can edit the service steps and requested/redo/walk-in checkboxes up to 14 days after the appointment was checked out:
Note: You can also use cut/paste or drag/drop to move an appointment within the same day to a different start time, servicing employee, or resource.
- Select the appointment to reveal the Smart Assistant.
- Select Edit.

- On the Edit Appointment Details window, you can edit the step timings and checkboxes as needed.
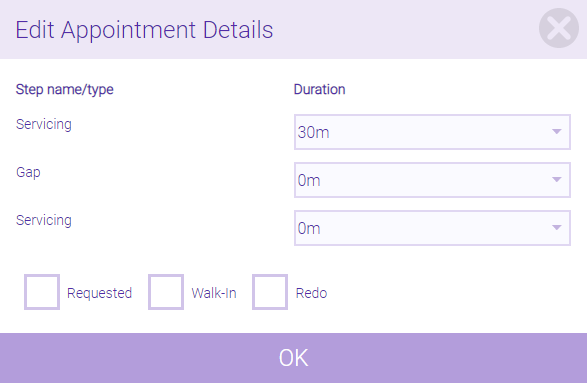
- When finished, select OK to update the checked-out appointment.