Booking an Appointment
The Appointment Editor in the Appointment Book is the most common way to create appointments in Meevo. Appointments can also be booked through Online Booking, Booking Agent, Walk-in Manager, and Wait List, but you will most often book appointments through the Appointment Book.
- Open the Appointment Book.
- Select the desired time block in the Appointment Book calendar.
- Select Book. The Appointment Editor appears.

Note: From Appointment Editor, you can change the Date and Time of the appointment if needed.
- Status: See Updating the Status of an Appointment for details.
- Paying Client: Enter the client who will pay for the appointment. Some notes on this field:
- Enter any of the gift card, membership, or package Convobar lookup shortcuts to populate the Client field.
- If the client is a one-time visitor or does not want to share contact information, select Anonymous (shown below) and select Anonymous Female, Anonymous Male, or Anonymous Other. Anonymous clients do not have a profile.
![]()
- To create a new profile or edit an existing profile, select Add or Edit below the field. This opens the Client maintenance form. Upon selecting Save or Cancel, you will be taken back to the Appointment Book to complete your original task.
- Client: The Paying Client automatically appears here. If the client receiving the service is different from the paying client, select a new client.
- Appointment Category: Select an Appointment Category, if desired. If a client has multiple appointments on the same day, all appointments are grouped under the same selected Appointment Category.
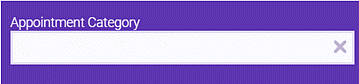
Note: The Appointment Category drop-down in Appointment Editor can be set to a required field. See the Require Appointment Category option in Business Preferences.
- Service: Locate the service by typing the service name or service code, and then select the service. This adds the service to the right pane underneath the servicing client's name.
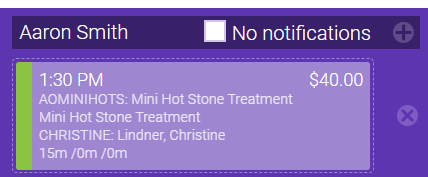
Note: You can turn off all notifications for the servicing client for this appointment only by enabling No notifications.
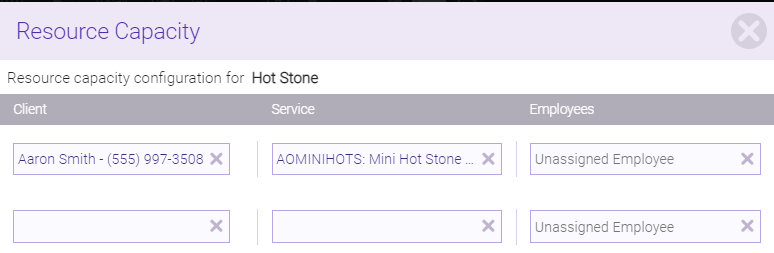
- If you selected a service that requires a resource, the Resource field appears automatically with the next available resource selected. To make changes to clients or services in the resource, you can select the Resource config button to the right of Resource.

- You can add clients and services to the resource using this window.
- Services in this form are limited to those that can be performed in the resource.
- If service add-on mappings are configured for the selected service, a pop-up window appears, listing all available add-ons as well as previously purchased services. Select the add-ons in the window and select Apply when finished. You can add or remove add-ons at any time by selecting "add".
![]()
- Service Steps: To adjust servicing or gap step durations, select Service Steps (shown below) to open the Steps window. Otherwise, the default timings in the service definition are used.
![]()
- To add another service to the appointment, select Add'l Service. This clears the Service field, allowing you to select another service and edit other fields, such as Client.
![]()
- To add another client to the appointment, select Add Client. This clears the Client and Employees fields, allowing you to select a new client a servicing employee.
![]()
- Employees: This displays the employee whose time you selected in the calendar. If you clear this field to select another employee, only employees who can perform the selected Service will be available.
- Requested, Walk-In, and Redo: Select the appropriate checkboxes for this appointment. See our topic on commission adjustments and splits for more details on how these options affect payroll.
- Requested: If the Requested employee commission option is enabled in Payroll Settings, requested employees will receive the configured commission rate.
If the appointment is requested, all text in the appointment will be bold, and there will be no black triangle in the bottom-right corner.
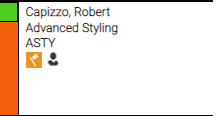
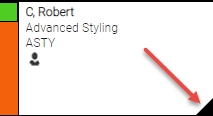
If the appointment is a non-request, it will appear with a black triangle in the bottom-right corner.
Note: The Requested option in Appointment Editor can be set to on or off by default when manually booking an appointment. See the When booking an appointment in the appointment editor... option in Business Preferences.
- Walk-In or Redo: If the Walk-In commission option or Redo commission option is enabled in Payroll Settings, servicing employees will receive the configured commission rate percentage.
Note: Marking a rebooked appointment as a Redo and saving will immediately remove the rebook icon, as Redo appointments can never be considered a rebook. Deselecting the Redo checkbox will revert the appointment back to a rebook, if that applies.
- Employee Gender Preference: If the client has a gender preference for the service provider, select the appropriate option. This option appears if the Business Preferences option Use gender preference when booking appointments is enabled and the service definition option Force gender preference when booking an appointment is enabled.
- Resource: If any services require a resource, this field is available. Available resources will be auto-assigned, but you can manually change it if desired. Resources in this drop-down can have a red, yellow, or green dot:
- Green: The resource is available and will be auto-assigned.
- Yellow: The resource is available but will not be auto-assigned. This status can occur if a client is already booked in that Resource, but the Resource has a client capacity greater than 1. In this scenario, the only way to book this Resource is to book it manually in Appointment Editor.
- Red: Resource is not available.
- Notes: Enter any appointment notes here. Appointment notes appear as pop-ups when triggered according to your selection in the Show Notes In drop-down.
- Checkin: The note appears immediately after a client is checked in.
- Register: The note appears immediately after the client is added to the Client field in the register.
- Chk/Reg: The note appears in both areas described above.
- When finished, select Save.