AQ022: Small Client Work Ticket
The AQ022 report provides three small client work tickets per page that includes client details, visit and appointment notes, service and retail history, future appointments, and more. The AQ022 provides a barcode for a quick lookup in Meevo and a 3rd Party ID field for connecting this client in other systems.
Tip: Run the AQ022 report each morning and present it to employees before the first appointment arrives.
What is a "visit" in this report?
This report follows our usual standard for what constitutes a visit: a visit occurs when a client is rung up for at least one service on a transaction. It is not necessary for the service to have been booked before it was rung up.
Report definitions
- Barcode: Client's barcode is the code 39 equivalent of the Numeric Identifier field in the client's profile.
- 3rdPartyID: The Third Party ID field in the client's profile.
- First/Last Visit: The dates of the client's first and most recent visits to the business.
- Birthday: The client's birthday as defined in the client profile.
- # Srv. Visits: The total number of transactions with at least one service for this client.
- Points Available/Value: The number of points and dollar equivalent available to the client.
- Appointments for [date]: Displays the time, service (including add-ons), resource, service provider, price for that day according to the Appointment Editor (if the option Show prices for appointments booked is enabled in Work Ticket Options), and whether the employee was requested for that appointment.
- Visit Notes: Displays information such as Type, Entered On, and Employee. Some Visit Notes may not display depending on your Work Ticket Options.
- Appointment Notes: Displays any notes recorded in the Appointment Editor for this appointment.
- Service History: This section appears if Show transaction history is selected in Work Ticket Options and displays the date, service code, service provider, and price paid at the register (if the sub-option Show Pricing is enabled under Show transaction history) for every service purchased by the client, including add-ons.
- Retail History: This section appears if Show transaction history is selected in Work Ticket Options and displays the date, retail code, associated employee, and price paid at the register (if the sub-option Show Pricing is enabled under Show transaction history) for every retail item.
- Future Appointments: Displays the date, time, service code, service provider, and price according to the Appointment Editor (if the option Show prices for appointments booked is enabled in Work Ticket Options).
Setting up the AQ022 report
- Type AQ022 in the Convobar, or go to Meevo > Reports > Appointments, and then select the AQ022 report.
- Select a date or date range for running the report:
- To run a report for a specific date range, select Custom and specify the Start Date and End Date for the report.
- Otherwise, select a predefined date or range (Yesterday, This Week, Last Week, etc.).
Note: If you select a predefined range (a date other than Custom), you can still change the Start Date and End Date. Doing so automatically changes the date range to Custom.
- Order Tickets By:
- Client Name: Tickets are ordered by client name (Last, First or First, Last depending on your Business Information setting).
- Date and Time of Appointment: Tickets are ordered by appointment date, and then start time.
- Employee Code: Tickets are ordered by the servicing employee's code.
- Work Ticket Generation:
- One Per Client Per Day: This creates 1 work ticket per client, per day.
- One Per Employee Per Day: This creates one work ticket per employee who is servicing a client, per day.
- Display Client Photos: Shows client photos (taken from client profile) on the work tickets.
- Client Search: Begin typing into this field to reveal client names that match your entry. Select Add client to include that client in the report. You can add as many clients to the report as needed.
-
All Employees: Enable this checkbox to run the report for all employees within the date range. This includes active, inactive (including terminated), and deleted employees. Or, to run the report for specific employees, deselect the checkbox and use the drop-down to select employees or Employee Categories. You can show or hide inactive employees in this list, but deleted employees will never appear here. Note the All Employees "bubble" in the Employee list selects all employees in that list; it is not the equivalent of selecting the All Employees checkbox.
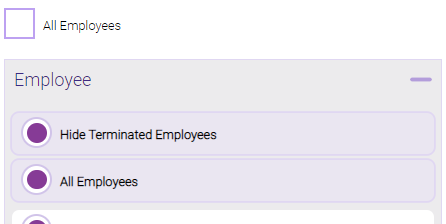
Note: Selecting All Employees will also return any data tied to the House employee.
- All Services: This option allows you to print Work Tickets only for clients who are booked for one of the selected services. Add-ons are not considered; the AQ246 covers booked add-ons.
Running the report
- When you are ready to generate the report, select a Report Format beside the Run Report button.

- Here is a rundown of each format type:
- PDF: Each time you select Run Report with PDF selected, Meevo opens a separate browser tab that displays the PDF'ed report. Meevo remains on the setup page, so you can quickly jump back over to Meevo to run more date ranges or other reports. Each PDF report you run will open its own browser tab, so you can easily review and compare reports by simply jumping between browser tabs.
Note for viewing on iOS: If viewing a PDF on a mobile device running iOS, swipe from left to right on the screen to return to Meevo. - HTML: This is our original legacy format, which opens the report within Meevo. All of the functionality within that report is still there and available via the toolbar.

- XLSX: Each time you select Run Report, your browser auto-downloads the report in .xlsx format. Select the downloaded file in the browser footer to open the spreadsheet.
- PDF: Each time you select Run Report with PDF selected, Meevo opens a separate browser tab that displays the PDF'ed report. Meevo remains on the setup page, so you can quickly jump back over to Meevo to run more date ranges or other reports. Each PDF report you run will open its own browser tab, so you can easily review and compare reports by simply jumping between browser tabs.
- Select Run Report to generate the report in your chosen format. Depending on the type of report and criteria you entered, this process may take a few minutes.