Adding and Managing Employee Profiles
To get to employee profiles, go to Meevo > Data > Employees, or type emp into the Convobar.
To add an employee profile
Tip: To create employee profiles quickly, we recommend creating Employee Templates and then applying those templates to each employee profile. It is much quicker to apply a template than it is to configure each option in each profile!
- From the Employees search form, select Add New.
- Set up the Login Credentials:
- Username: The username is required and must be unique.
- Set Password: Create a password for the employee, making sure you satisfy the listed password requirements.
- The Employee Rating section displays the average and totals of all published and not published 5 Star Ratings from clients. This excludes any deleted ratings.
- Force password change: Any user who has security to edit an employee profile can enable this checkbox. When enabled, the next time this employee logs in while this checkbox is selected, the employee will be forced to change their password. Once the password has been changed, this box is deselected.
- Enable two-factor authentication: Two-factor authentication (2FA) is a security method that, when enabled in Meevo, adds an extra layer to employee accounts beyond the username and password. See Setting Up Two-Factor Authentication for details on setting up 2FA.
- External id: The External id is typically used to link employee profiles from external platforms during the data conversion process. Only Full Access Users can see this read-only field.
- Auto Lockout user after ___ minutes of inactivity: Determines how many minutes a user can be inactive before a lockout occurs.
- If lockouts are enabled in Business Preferences, then this setting on the profile overrides that Business Preferences setting. If this option on the profile is set to 0 (zero), then Meevo looks to the Business Preferences lockout setting.
- If lockouts are not enabled in Business Preferences, then lockouts are off for all users regardless of what is set in this option on the profile. However, as a security measure, Meevo will eventually lock out any user who was inactive for 72 hours (3 days).
- Is Employee: Select this option to continue configuring this profile as an employee, rather than a user. Most of the options below are only available if Is Employee is selected.
- Email Address: This is the email address that Meevo will use for employee email notifications. Changing this email address unchecks the email appointment notification setting further down the form, so scroll down and re-enable that option if needed.
- Please select employee's role: Select the employee's role from the drop-down.
- MeevoXchange Access Level: Determines what this user can do in the MeevoXchange. Note that access to the MeevoXchange tile is secured in Security Administration; the MeevoXchange Access Level setting essentially adds a layer of security for users who have access to the tile.
- Admin: User can view and change everything within the MeevoXchange, including Meevo Subscription/SMS/Support plan, modules, etc.
- Read_Only: User can only view information in the MeevoXchange. This is the default setting for new and existing employee profiles.
- No Access: User cannot launch the MeevoXchange.
- Enable conflict messaging in the Appointment Book: This option is for power users only. If deselected, all conflict messages in the Appointment Book are turned off for this employee when this employee is logged in. Validation messages will still appear, as these cannot be turned off.
Go here for details on the difference between conflict and validation messages, or go here for information on conflict message options. - Enter the employee details, including First and Last Name. For instructions on uploading a photo, see Uploading an Employee Photo.
- Employee Code: The code is what appears in an employee's column header in the Appointment Book and Schedule Manager, so make sure the code is unique and that it makes the employee easy to identify. Note that Schedule Manager orders employee columns alphabetically by code.
- Employee Number: An identifier that, for privacy reasons, can be used in place of the employee's name in the DE040: Employee Payroll report.
- Title: The title of the employee/student/teacher will appear beside the employee name in various areas of Online Booking.
- Restricted: Flags the employee as "restricted". See Restricting an Employee for more information.
- Nickname: The employee's nickname will be used in Online Booking and in all default Meevo notifications that mention the employee.
- Associated Client Profile: By associating a client profile with an employee, you can sell items to the employee via that client profile (since employees cannot be recipients of sale items in the register) and assign the employee a membership through this client profile. Without a client profile association, you cannot perform either of these actions for the employee.
Select Add to create a new client profile and link to it here or, if creating this employee's profile for the first time, upon Save, a prompt will appear asking if you'd like to create a linked client profile. Select Yes to automatically create that client profile based on the employee's profile information. The following information is copied over from the employee profile: First and Last Name, Gender, Address 1 and 2, City, State, ZIP Code, Mobile and Home Phone, and Birth date. - Gender: The selection here may impact the employee's booking availability if the client specifies a preferred gender.
- Hire Date: Select the date of hire.
- Terminate Employee (option appears after initial save of profile): Go here for details on terminating an employee.
- Schedule a Promotion (option appears after initial save of profile): Go here for details on promoting an employee.
- Apply Template: Select an Employee Template to quickly apply a common set of options to a new or existing employee profile.
- Appointment Book Style: This determines the background color and text color of the employee's column header in the Appointment Book. In the example below, we set the Background to a shade of blue and Text to black.

- Employee Category: Select a category to add it to the list. You can add multiple categories.
- Configure the Options:
- Price level: Select the default price level clients will be charged for a service that this employee is not configured to perform. If a service the employee does not perform is pulled into the register, Meevo will match up this setting with the price level configured in the service definition to determine the price. However, if you change this setting, Meevo will prompt you asking if this Price Level should apply to all of this employee's services (Can Perform and otherwise).
- Display prompt when double booking this employee: A conflict message appears if any user attempts to double-book this employee in the Appointment Book.
- Allow sales: Employee's tile is a selectable option in register to receive credit for sales. Note that employees who are booked to perform a service appear in the Smart Receipt on checkout regardless of the status of this option.
- Allow tips: Employee can receive tips from clients at the register.
- Include in Overall Productivity Calculations: Includes the employee's productive time in your business' overall productivity reports such as the MA060 and Smart Tiles. If this option is not selected, this employee's time will be excluded from all productivity calculations, regardless of whether or not the Work Activity is configured as "productive."
- Show on schedule: Allows you to manage the employee's schedule in Schedule Manager. Deselect this option if you do not need to schedule this employee, or if you are managing employee schedules outside of Meevo.
- Default Appointment Book View: Select the default view (All, My Day, My Week, or Cascade) that the Employee will see when opening Appointment Book. A Cascade view, when enabled, sets the employee column order based on when an employee is scheduled to work: from left-to-right is earliest start time to latest start time. Note that this is not a security setting; employees can still view other appointments on the book.
- Enable Appointment Book Masking, Show Every __ Minutes, and Masking label: See Setting Up Employee Masking for details on masking.
- Enable Intelli-Booking: Makes this employee eligible for Intelli-Booking timings. See Setting Up and Using Intelli-Booking for complete details on this feature.
- Contact Information: The Mobile Phone entered here is used for SMS notifications. If this field is left blank, the employee will not be able to receive SMS notifications.
- Under Notification Settings are options for employee notifications.
- Birth Date: Enter the employee's date of birth.
- Select Save to save the profile.
To edit an employee profile
Tip: You can apply an Employee Template to an existing profile to quickly update the information.
- Locate the profile and select it.
- Select Edit, and then make your changes.
- When finished, select Save.
To inactivate an employee profile
If an employee is leaving your business or taking an extended leave of absence, you should inactivate the employee's profile. When you inactivate an employee's profile:
- If they are currently logged into Meevo when made inactive, the employee is immediately logged out.
- Only the employee's login is inactivated. To remove an employee completely from Meevo, you should terminate the employee.
- The inactivated employee will not count towards your user licenses. Only active Employee/Student/Teacher profiles count towards the number of licenses in use.
- The profile is removed from the default employee form search results, resulting in less clutter in your search results. It will not appear in search results unless Inactive is selected from the Advanced menu.
- Existing appointments and blocks are not affected and remain in the Appointment Book.
- If the employee does not have any appointments or blocks on the book and is made inactive, the employee is removed from the Appointment Book (even if Show on schedule is enabled on their profile). They also will not appear in the Employees field in Appointment Editor.
- If the employee does have at least one appointment or block on the book, the employee will remain in the Appointment Book and continue to be selectable in the Employees field in Appointment Editor.
- Inactivating an employee profile does not remove the data associated with that employee. When you run a report with the All Employees checkbox selected, Meevo includes inactive and deleted employee data.
Inactivating an employee profile
- Locate and select the employee profile.
- Select Edit.
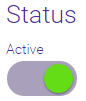
- Under Status, select the Active switch to toggle it to Inactive.

- Select Save.
Reactivating an employee profile
- Locate and select the profile. Remember to select Inactive from the Advanced Search menu to search for inactive profiles.
- Select Edit.
- Under Status, select the Inactive switch to toggle it to Active.
- Select Save.
To delete an employee profile
The main reason you might want to delete an employee profile is to remove that employee from the Employee drop-down in Meevo. Otherwise, there is no real advantage to deleting a profile instead of inactivating it. Deleting a profile performs a "soft" deletion, meaning that even after it is deleted, the profile can be recovered at any time by undeleting it.
When you delete an employee profile:
- If they are currently logged into Meevo when deleted, the employee is immediately logged out.
- It will no longer appear in Meevo drop-down menus with the exception of the Appointment Book. Whether an employee is selectable in the Appointment Book depends on whether they have any booked appointments or blocks.
- The deleted employee will not count towards your user licenses. Only active Employee/Student/Teacher profiles count towards the number of licenses in use.
- If the employee does not have any appointments or blocks on the book and is made inactive, the employee is removed from the Appointment Book (even if Show on schedule is enabled on their profile). They also will not appear in the Employees field in Appointment Editor.
- If the employee does have at least one appointment or block on the book, the employee will remain in the Appointment Book and continue to be selectable in the Employees field in Appointment Editor.
- Also note deleting an employee profile does not delete the data associated with that employee. When you run a report with the All Employees checkbox selected, Meevo includes inactive and deleted employee data.
Note: Deleted profiles are only searchable through the Employee maintenance form. To delete or undelete an Employee profile, the selected location must be the owner of the profile.
Deleting an employee profile
- Locate and access the Employee profile.
- Select Delete. A confirmation message appears, asking if you are sure you want to remove this Employee.
- Select Yes on the confirmation message.
- If this Employee has a schedule, a second confirmation appears, asking to confirm removing future schedules.
- Select Yes to delete this Employee's future schedules. Past schedules will remain in Meevo.
- Select No to leave this Employee's future and past schedules in Meevo unaffected.
- If this Employee has blocks set up, a third confirmation message appears, asking to confirm removing future blocks.
- Select Yes to delete this Employee's future blocks.
- Select No to leave this Employee's future blocks in Meevo unaffected.
Undeleting an employee profile
- Locate and access the Employee profile.
- On the Employee profile maintenance form, notice that in place of the status switch is the word Deleted.
- Select Undelete. The status switch reappears in place of the word Deleted. By default, the switch is set to Active. You can set this to Inactive if needed.
- Save your changes to undelete the employee.