DC000: Low Client Summary
The DC000 report displays a detailed breakdown of employees, students, and teachers (collectively referred to as "employees" for the rest of this topic) who have serviced fewer than the selected number of clients in the date range, with Days Scheduled, Client Visits, Avg Clients/Day, Next Appointment for each employee, and more.
For example if the Low Client Threshold is set to 5, the report will aggregate data for all employees who saw less than 5 clients on a given day in the date range.
What is the difference between a "visit" and a "unique client?"
This report follows our usual standard for what constitutes a visit: a visit occurs when a client is rung up for at least one service on a transaction. It is not necessary for the service to have been booked before it was rung up.
A unique client is just an individual who only counts once towards the Unique client metric, regardless of how many visits they have. So if Matt visits a location 4 times in the date range, he will count as 1 unique client and 4 visits.
How this report works
For an employee to be included on a given day, they must be scheduled on that day for a Work Activity set to Show as bookable time. The duration of the scheduled, bookable Work Activity does not matter. Even if it was for only a few minutes, this report will look at the employee for the entire day. If the employee was not scheduled for a bookable Work Activity that day, the employee will be excluded from the analysis of that day.
Additional things to consider
- If a service is booked over a non-bookable Work Activity and the service is checked out, that will count as a "seen client" for the credited employee, but only if the employee was also scheduled for a bookable Work Activity at some point during that day.
- Transaction-only service sales count the same as a booked appointment that was checked out, but only if the credited employee was also scheduled for a bookable Work Activity at some point during that day.
- Each client is unique per employee per day.
- Anonymous clients are treated as unique per transaction.
- A service refund does not count as a sale, nor does it undo the "client seen" statistic for the servicing employee.
- A voided service transaction "subtracts" a client visit from that employee's total.
- This report analyzes both transient and non-transient clients.
Report definitions
Note: Below, "x" refers to what the Low Client Threshold is set to in the report setup screen. "Eligible" employees are employees who meet the requirements laid out in How this report works in this topic.
Employees Total for Date Range
- Employees with x or Fewer Clients: The number of eligible employees who saw "x" or fewer clients.
- Combined Days with x or Fewer: The total number of days where employees saw fewer than "x." Each employee only counts once for a given day.
- Client Visits in Date Range: Days where an employee was credited with a service sale.
Details table (bottom portion of report)
- Days Scheduled: Total number of days where an employee was scheduled for a bookable Work Activity or credited with a service sale. Each employee only counts once for a given day.
- Days with x or Fewer Clients: Total number of days where the employee saw "x" or fewer clients.
- Client Visits: Days where the employee was credited with a service sale.
- Avg. Clients/Day: (Client Visits / Days Scheduled)
- Next Appointment: The day and date of the client's next appointment after the report run on date.
Setting up the DC000 report
- Type DC000 in the Convobar, or go to Meevo > Reports > Clients, and then select the DC000 report.
- Select a date or date range for running the report:
- To run a report for a specific date range, select Custom and specify the Start Date and End Date for the report.
- Otherwise, select a predefined date or range (Yesterday, This Week, Last Week, etc.).
Note: If you select a predefined range (a date other than Custom), you can still change the Start Date and End Date. Doing so automatically changes the date range to Custom.
- Low Client Threshold: The report will display employees who, on a given day, saw this many or fewer clients. For example, if the Low Client Threshold is set to 5, the report will analyze each day in the date range and for each day, display each employee who saw 5 clients or fewer.
-
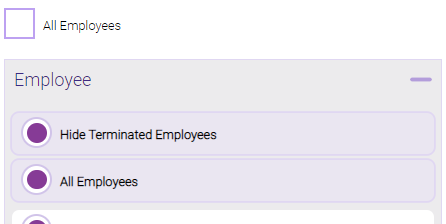
All Employees: Enable this checkbox to run the report for all employees within the date range. This includes active, inactive (including terminated), and deleted employees. Or, to run the report for specific employees, deselect the checkbox and use the drop-down to select employees or Employee Categories. You can show or hide inactive employees in this list, but deleted employees will never appear here. Note the All Employees "bubble" in the Employee list selects all employees in that list; it is not the equivalent of selecting the All Employees checkbox.
Note: Selecting All Employees will also return any data tied to the House employee.
Running the report
- When you are ready to generate the report, select a Report Format beside the Run Report button.

- Here is a rundown of each format type:
- PDF: Each time you select Run Report with PDF selected, Meevo opens a separate browser tab that displays the PDF'ed report. Meevo remains on the setup page, so you can quickly jump back over to Meevo to run more date ranges or other reports. Each PDF report you run will open its own browser tab, so you can easily review and compare reports by simply jumping between browser tabs.
Note for viewing on iOS: If viewing a PDF on a mobile device running iOS, swipe from left to right on the screen to return to Meevo. - HTML: This is our original legacy format, which opens the report within Meevo. All of the functionality within that report is still there and available via the toolbar.

- XLSX: Each time you select Run Report, your browser auto-downloads the report in .xlsx format. Select the downloaded file in the browser footer to open the spreadsheet.
- PDF: Each time you select Run Report with PDF selected, Meevo opens a separate browser tab that displays the PDF'ed report. Meevo remains on the setup page, so you can quickly jump back over to Meevo to run more date ranges or other reports. Each PDF report you run will open its own browser tab, so you can easily review and compare reports by simply jumping between browser tabs.
- Select Run Report to generate the report in your chosen format. Depending on the type of report and criteria you entered, this process may take a few minutes.