Setting up a Worldpay Merchant Account
This topic covers setting up a standard Worldpay merchant account. The WorldpayGC option is specifically used for third-party gift cards. For details on setting up a third-party gift card with the WorldpayGC Account Provider, see Setting Up a Third-Party Gift Card Integration.
How do I process HSA/FSA cards with Worldpay?
To be able to successfully process HSA/FSA cards, your business MCC code must be eligible. If it is, you can process HSA/FSA cards using your default Merchant Account.
Some businesses are required by the card issuer to process HSA/FSA cards using a separate, dedicated Merchant Account. This can be achieved in Meevo if using HSA/FSA cards on file. Read on for details!
How do I dedicate a Worldpay Merchant Account to processing HSA/FSA cards on file?
Enable the HSA/FSA Account checkbox on the Merchant Account definition to dedicate the account to processing HSA/FSA cards. When this option is enabled, an additional HSA/FSA checkbox appears on the screens for adding or editing a card on file. When you enable the HSA/FSA checkbox for a card, Meevo will use your dedicated HSA/FSA Merchant Account to process HSA/FSA purchases with that card. There is no need to manually switch drawers or Merchant Accounts; Meevo automatically uses the dedicated Merchant Account.
The HSA/FSA checkbox appears:
- In the Register when adding a card during a membership sale.

- In Membership Manager's CC/ACH tab when adding or editing a card.
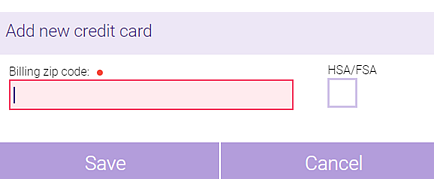
- In the client profile's Credit Card tab when adding or editing a card.

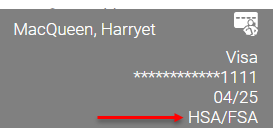
- Also, HSA/FSA cards are easily identifiable in the register by the label at the bottom of the Payment Type tile.
Note: For card present scenarios, we recommend creating a separate "HSA/FSA" drawer and assigning the HSA/FSA Merchant Account to that drawer. This way you can manually switch drawers and process the HSA/FSA card using your dedicated Worldpay Merchant Account.
To add a Worldpay Merchant Account
To use integrated credit card processing in Meevo with Worldpay, you must first set up an account with Worldpay. They will provide you with the information you need to set up the Merchant Account in Meevo. Be sure to have that information on-hand when following the steps below.
- Go to Meevo > Register > Merchant Accounts, or type merchacct into the Convobar.
- From the Main tab, select Worldpay as the Account Provider.

- Account Name: Give this Merchant Account a name that will make it easily recognizable in Meevo, like "Worldpay."
- Fill in the Account ID, Account Token, Acceptor ID, and Terminal ID provided by Worldpay.
- Default Account: Select to make this Merchant Account the default account for all transactions that occur outside of the register, such as membership billing and Online Booking.
Note: In the Memberships section of Business Preferences, you can select a Merchant Account specifically for memberships. That setting overrides the Merchant Account selected here, but only for memberships.
- Restrict credit card refunds to the credit card(s) used on the original purchase: When this is enabled, a card can be refunded to only if it's the card that was used on the original transaction. This prevents "unlinked" refunds, which provide funds to a card other than the one used on the sale. Unlinked refunds are generally considered risky, and as a best practice credit card refunds should always go back on the original card used for payment.
- HSA/FSA Account: Enable this checkbox to designate this Merchant Account for processing HSA/FSA cards. See our FAQ above for more details on this feature.
- Enable Auto Account Updater: When enabled, Meevo communicates with your payment processor to automatically apply and updated cardholder information that may be available (like a card's expiration date). Worldpay customers should also see Refreshing a Worldpay Card On File Token for details on keeping that token up to date. The Auto Account Updater is a fee-based service provided by Worldpay. If you are interested in using this service, contact Worldpay for more information. Enabling this option reveals the following two options as well.
- Automatically update expired credit card information for recurring billing payments: Meevo routinely checks with Worldpay to see if there is updated card information available. If so, the token information is updated in Meevo, and if a prior billing attempt failed, the billing engine will re-attempt the billing the next time it runs. This setting is specific to membership cards on file for recurring payments. Note this option does not purge expired cards; see this topic for details on how Meevo purges cards on file.
- Automatically update expired ancillary credit card information: Meevo routinely checks with Worldpay to see if there is updated card information available. If so, the token information is updated in Meevo. Note that this setting is specific to client profile's credit cards on file. Note this option does not purge expired cards; see this topic for details on how Meevo purges cards on file.
- Disable Confirm Amount prompt after card removal: Turns off the final step on a credit card terminal where a client has to confirm the transaction amount after the terminal has instructed the client to remove their card.
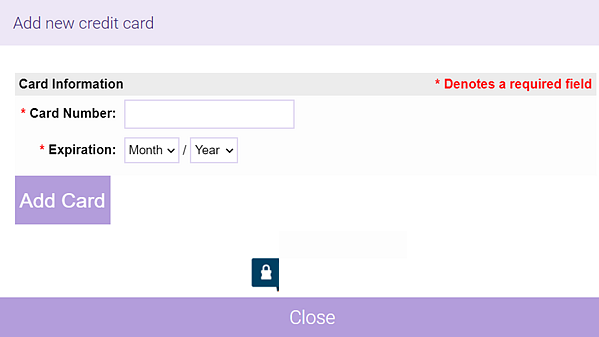
- Enable Hosted Page: If this option is enabled, you will be able to enter client credit card information into an embedded page within Meevo to execute a transaction or to add a client credit card on file. This is essentially a "virtual terminal," so Hosted Page will be a selectable option in most places that Meevo asks you to select a terminal (Drawer definition, client profile's Credit Card tab, the register, etc.). This option is useful in the event your credit card devices are down or if your business does not have any credit card devices at all.
- Hosted Page only available for use if there are no active devices currently available: When enabled, the only time Hosted Page will appear in the terminal selection box is if there are no active credit card terminals set up in Meevo.
- Perform an Address Verification and CVV check when using the hosted page to pay instantly: Businesses using Worldpay Merchant Accounts can enable address verification, ZIP code, and CVV check on transactions that are rung up through the Meevo register hosted page or eGift hosted page. Transactions that fail the check will be instantly reversed, preventing potential fraud. Note enabling this option may result in additional fees from your provider. This option is defaulted to ON for all new and existing Worldpay Merchant Accounts.
- Enable Pre-Authorization when saving credit card(s) for future use via the hosted page: This option has Meevo pre-authorize a credit card before adding the card on file via hosted page (in the register, client profile, or membership/payment plan). A pre-authorization verifies that funds are available and that the card is active. If you enable this feature, be sure to set an Amount to Pre-Authorize (max of $100).
- Enable signature capture on capable credit card devices: If enabled, signature-capable credit card devices will prompt the client to digitally sign directly on the device.
- Signature Prompt Threshold Amount: This determines the minimum amount that would require a signature on a card transaction. By default, this is set to $25.
- Note: Even if signature capture is enabled, the device may not prompt for a signature. Worldpay devices follow the issuing bank’s verification requirements. If the bank does not require a signature for the card type or transaction amount, the device will automatically bypass the signature prompt.
- Use for membership billing: Sets this Merchant Account as your default account for membership billing. This also updates the default membership account setting in Business Preferences > Membership Settings.
- Use for eGift transactions: Sets this Merchant Account as your default account for eGift transactions. This also updates the default eGift account setting in eGift > Main.
- Enable Tips: Allows clients to apply tips via the credit card device by selecting one of the pre-defined options you configure here, or by entering their own tip amount on the device. You can configure up to 5 tip options.
- Percentage or Currency: Select the units for the tip amounts you will configure.
- Tip Amount Options: Select the "plus" icon to add another tip option.
- Tip Amount: Enter the amounts that clients can select.
- When finished, select Save.
- Next, pair your newly created Merchant Account to your credit card device.