Setting Up Payment Plans
Security
Configure security for Payment Plans using the following keys in Security Administration:
- Register > Payment Type Access > Payment Plan controls access to the Payment Plan tile in the register's list of Payment Types. Payment Plans are created exclusively in the register, so set this key to Grant to allow a user to create Payment Plans for clients.
- Register > Refund > Allow Payment Plan Refund Override controls whether a user is allowed to edit the Amount and Payment Plan Reduction fields when refunding items that are part of a Payment Plan transaction. This key essentially decides whether a user can issue part of the refund as cash for the client.
- Management > Payment Plan Manager controls access to the Payment Plan Manager. These keys are available at the Location level only. Within this section are a number of sub-keys that control access to Payment Plan Manager tabs and what a user can do within those tabs.
Options in Business Preferences
In Business Preferences, you can turn Payment Plans on or off and define the max amount permitted for a Payment Plan:
- Enable Payment Plans: Enabling this option exposes a Payment Plan tile in the list of Payment Types in the register, where Payment Plans are created. Turning this option off means new Payment Plans cannot be created, but it does not affect the status or terms of existing Payment Plans. Note to select this checkbox, you must also have Enable credit card processing selected in the Register section.
- Set Fixed Billing Date of the Month: Choose the default day of the month on which newly created recurring payments will be scheduled.
- This setting establishes a default billing date that will appear in the Register during the sale. Users with the appropriate security permissions can modify the billing date during enrollment in the Register.
- Existing Payment Plans are not automatically updated and will continue using their current billing schedules unless adjusted manually.
- Automatically retry declined payments every __ days up to __ times: Configures the number of days between retry attempts (1–7 days) and the maximum number of retry attempts (1–3) for eligible declined payments. This can help recover payments automatically without requiring manual reprocessing through the EFT Control Panel or waiting for automatic billing on the next billing cycle.
- Maximum Payment Plan amount: This is the maximum amount allowed for a single Payment Plan.
- Maximum number of Payments: This is the maximum number of payments allowed for a single Payment Plan.
- Under Memberships, make sure Enable Automatic Billing Service (Membership, Payment Plans, etc.) is selected so your Payment Plan clients are billed on schedule.
Payment Plan forms
We recommend you use Meevo's Docs & Forms to create and send a Payment Plan form/agreement to each client who enters into a Payment Plan. This helps document client consent and clearly outline plan terms at setup.
Payment Plan forms can be sent to the client before or after a Payment Plan is completed in the register.
- When setting up a Payment Plan in the register, you’ll have the option to send the agreement before finalizing the transaction.
- If it is not sent at that point, the notification is sent when the transaction is completed.
- Completion of the form is not required to be able to finalize the transaction.
Reporting
The DB040: EFT Master List report displays detailed information related to Payment Plans and Memberships.
The MR080: Register Summary report displays Payment Plan information in the Non-Monetary section.
Creating a Payment Plan in the register
A Payment Plan gets created in the register during a client transaction. This is done by selecting the Payment Plan payment type before the transaction is finalized. Then from the register Smart Receipt, you'll select which items go on the Payment Plan, and from the register's right pane, you'll set up the terms.
Note: A client can have an unlimited number of Payment Plans, but only one Payment Plan can be created per transaction.
- When you are ready to create the Payment Plan, select Pay Now.
- Select Payment Plan from the list of Payment Options.
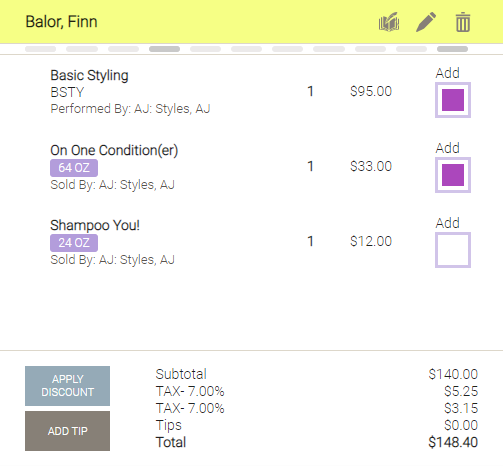
- On the Smart Receipt, an Add checkbox appears to the right of each eligible item. By default all eligible items are selected, but you can remove items by deselecting Add. A Payment Plan does not need to satisfy the entire balance due.
- From the register's right pane, configure the terms of the Payment Plan. The total Balance Due and Payment Plan Amount appear above the options.
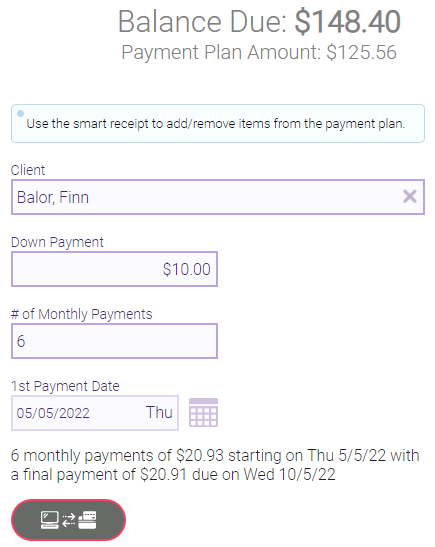
- The Client is the person responsible for the Payment Plan balance.
- The Down Payment amount is paid up-front as part of the transaction. This is not a "non-refundable" down payment; the down payment is deducted from the overall Payment Plan Amount. So, if a client refunds all items on the plan, they will be refunded their down payment as well.
- # of Monthly Payments determines the number of monthly installments required to satisfy the Payment Plan Amount. To get the monthly payment amount, Meevo divides the Payment Plan Amount by the number of monthly payments.
- The 1st Payment Date is when the first monthly payment is due. The soonest this can be is one month from today.
- As you adjust these options, Meevo automatically updates the plan details (which appear below the 1st Payment Date). Note Meevo will point out if the final payment differs from the previous payments.
- Tax on selected line items is rolled into the final amount of the Payment Plan.
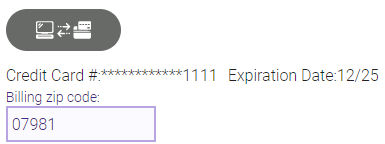
- Next, you must attach a credit card as the payment method for the plan. The card being added here will only be associated with this Payment Plan and will appear in Payment Plan Manager (on the Credit Card tab) and in the Register (as an available Credit Card payment type).
- Select Payment Plan Note from the bottom of the register pane to add comments about the plan. These notes appear in the Payment Plan Manager's Notes tab.
- When finished creating the Payment Plan, select Add Payment to update the Smart Receipt.
- If you've configured a Payment Plan form/agreement via Docs & Forms, a modal appears asking if you'd like to send the Payment Plan notification now.
- Select Yes to send the notification to the client immediately. The form does not need to be filled out to finalize the transaction.
- Select No to send the notification automatically after completion of the transaction.
- To finalize the transaction, the client pays the remaining balance, if any, including any down payments. Upon completion of the transaction, Meevo creates the Payment Plan.
- The client’s receipt includes a dedicated section that clearly outlines the original terms of the agreement.
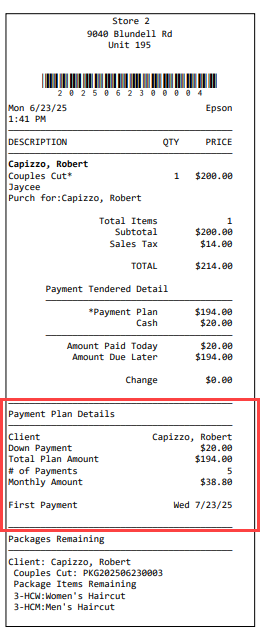
- Payment Plan items appear with an asterisk.
- The Payment Plan Details section only appears when a Payment Plan is first initiated and will not display on gift or insurance receipts.
- For clarity and record-keeping, if the receipt is reprinted, it will always show the original plan terms, even if the Payment Plan has been updated since.
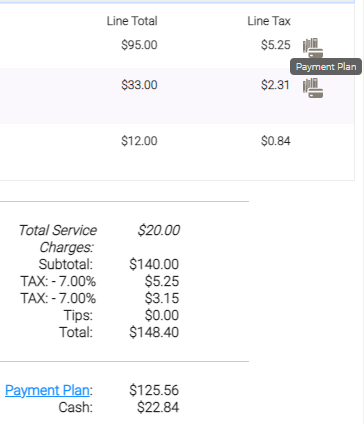
- In the Transaction Editor, items that were added to a Payment Plan appear with the Payment Plan icon. The Payment Plan line item is a link to the plan in Payment Plan Manager.
- Now that you've created a Payment Plan, see Managing Payment Plans for details on what you can do with plans after they've been created.