Importing Contacts into Email Marketing
Use this method to import clients into Email Marketing who do not meet Email Marketing's sync criteria.
What happens if I sync over a contact from Meevo who was already manually imported into Email Marketing?
Imported contacts are normally ignored by the Meevo sync. They are not automatically purged, nor are their custom fields automatically updated.
However, if the email address matches in both records, that can result in the two records being merged. If the records are merged, the final record is tied to the Meevo sync and will follow that Email Marketing sync logic.
What happens if I import a contact into Email Marketing who was already synced from Meevo?
If you import a contact who was already synced, Email Marketing will present options as to how to handle the profile data (e.g. ignore, replace, etc.).
To import contacts
Note: Imported contacts won't trigger automation events because the Email Marketing sync does not update custom fields.
For additional details on importing, you can also review the Email Marketing Self-Help topic How To Import Contacts From a File.
- Log into Email Marketing.
- Select Audience, and then select Imports from menu on the left.
- Select Import Contacts.
- On Step 1:
- Drag-and-drop or choose the file to upload. Be sure to review the Important! information and acceptable file types.
- Enter the Source into the text field.
- Specify how to handle duplicate contacts.
- Specify if Email Marketing Should contact updates trigger a field change workflow if applicable. If you're unsure of what to do with this option, review Email Marketing's Self-Help topic Trigger Events: Field Change.
- Select Continue.
- On Step 2:
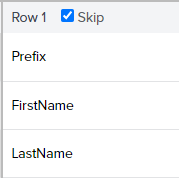
- Next is the import mapping screen. If your spreadsheet has a header row (which it will if you are uploading an export from Client Selection Export), then make sure you select Skip in Row 1.
It is not necessary to map the contact fields.
- Select Continue when finished.
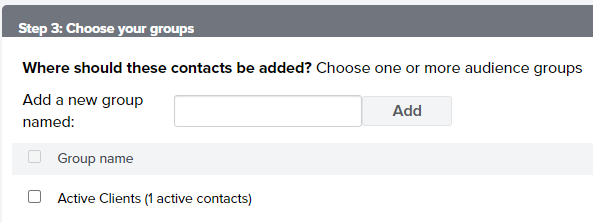
- On Step 3:
- Select where these imported contacts will go: an existing group or a new group.
- Select Continue when finished.
- On the Summary step, review the details of the import and select Import at the bottom of the page to complete the process. The actual import takes about a minute or two to complete.
Understanding the import results window
- Added: These are new contacts that did not already exist in your Emma audience and were successfully imported.
- Updated: These contacts already existed in your audience and had some updated information, so Emma modified their records.
- Skipped: Emma counts “skipped” from the entire audience, not just the CSV. So if some addresses were already in the system from past imports—even in other groups—they can be skipped. Contacts that can be skipped include:
- Contacts that already existed and had no changes to their information.
- Previously unsubscribed contacts (Emma will never re-import them).
- Contacts in your suppression list.
- Invalid email addresses or duplicates within the file that weren’t counted under “Errors” or “Duplicates”.
- Contacts that failed other internal rules (e.g., bounced in past sends).
- Duplicates: Refers to duplicate rows within your uploaded CSV.
- Errors: Errors are likely malformed rows that are missing a required field.